Pro-Fit Fix We
delved into our Pro-Fit pedals to repair a broken retention spring.
Now, we show you how it's done.
2,000,000+
Visitors! Joe
Correia of Toronto, Ontario, Canada, was our 2,000,000th visitor.
Thanks to Joe and our other
1,999,999 visitors for stopping by..
Go Mod Plenty
of "cycling cheesecake" photos in our Mod Gallery (Yes, there are bike photos
there, too)
Cinelli!
We put a classic (Campy-equipped) 1972 Cinelli Speciale Corsa back on
the road. Click
here for photos and words. Photos
of the finished bike
Why
Campy? Because nobody wears ShimaNO tattoos.
Taking
Ride Photos Campy Only's tips
for taking
photos of your Campy-equipped rides
Campy News and Rumors
News
and Rumors are now at the Campy
Only BLOG) -- Click
here for Campy Only news and Rumors
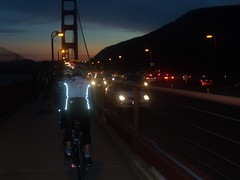
Photos and
Stuff from Campy Only's Cycling
Exploits Eric
Norris, the Campy Only Guy Photos from our
Campy-equipped rides,
shots of the Campy Only cycling
stable, and a few gratuitous shots of CampyOnlyGuy Eric
Norris.
Photo by Eric Norris
The Richard Sachs
Project Read
our archived reports and watch as master craftsman Richard Sachs built
a new frameset for Campy Only.
One-Hand Shifting Riders
who have lost the use of a hand or arm don't need to pack up their
Campy-equipped bikes. Click
here for our guide
to converting modern bikes to one-hand shifting and braking
One
of Campy Only's biggest fans is Groovy Boy. He
says our web site is "Totally Groovy!" Click
here for more Groovy Boy adventures
Chased by wild
turkeys! A
classic Campy Only moment ...
Click here for some unusual Campy Only Ride Cam photos!
Ergo Lever Repair and Upgrading We
took the plunge and have rebuilt Ergo levers many times, and if we can
do it, so can you! Click here for our rebuild tips, and a
complete parts list.
Want
to upgrade from 8 speed to 9 or 10? From 9 to 10?Click here
to read how!
Fans of
Campagnolo from as far away as Australia
converged on Davis, California, on August 26, 2001, to pay homage to
Tullio Campagnolo at the Cento Anni event. Click
here for
post-event wrap-up of our celebration of Tullio Campagnolo's 100th
Birthday


